

Estimated reading time: 21 minutes
Plain JavaScript is quick to ship. TypeScript bundled with Webpack or esbuild is built to scale. This article walks through both approaches end-to-end so you can make an informed choice for your next project.
Table of contents

Why This Question Matters Now
TypeScript web resources in model-driven apps have gone from a niche experiment to a mainstream practice — yet plain JavaScript is still the right answer in many situations. Model-Driven App JavaScript web resources have been around since the early Dynamics CRM days. For a long time, dropping a .js file into a solution and wiring it up to a form event was the only game in town. It still works perfectly well — but the ecosystem has moved on.
TypeScript has become the default language for serious frontend work. Build tools like Webpack and esbuild have made bundling a sub-second affair. Meanwhile, the @types/xrm package gives you full IntelliSense for the entire Xrm client API. As a result, the question is no longer can you use TypeScript for model-driven app web resources — it’s when does it make sense, and how do you actually set it up?
This article gives you both sides: a realistic picture of plain JavaScript and a complete walkthrough of TypeScript + Webpack and TypeScript + esbuild, with the same example implemented in all three.

The Example We’ll Use
Throughout this article we’ll implement the same business logic in each approach:
- On the
contactform, whenfirstnameorlastnamechanges, compose a greeting in a notification banner. - Fetch the related Account name via
Xrm.WebApiand display it. - Show a validation error if both name fields are empty.
Simple enough to be readable, complex enough to stress-test each approach.
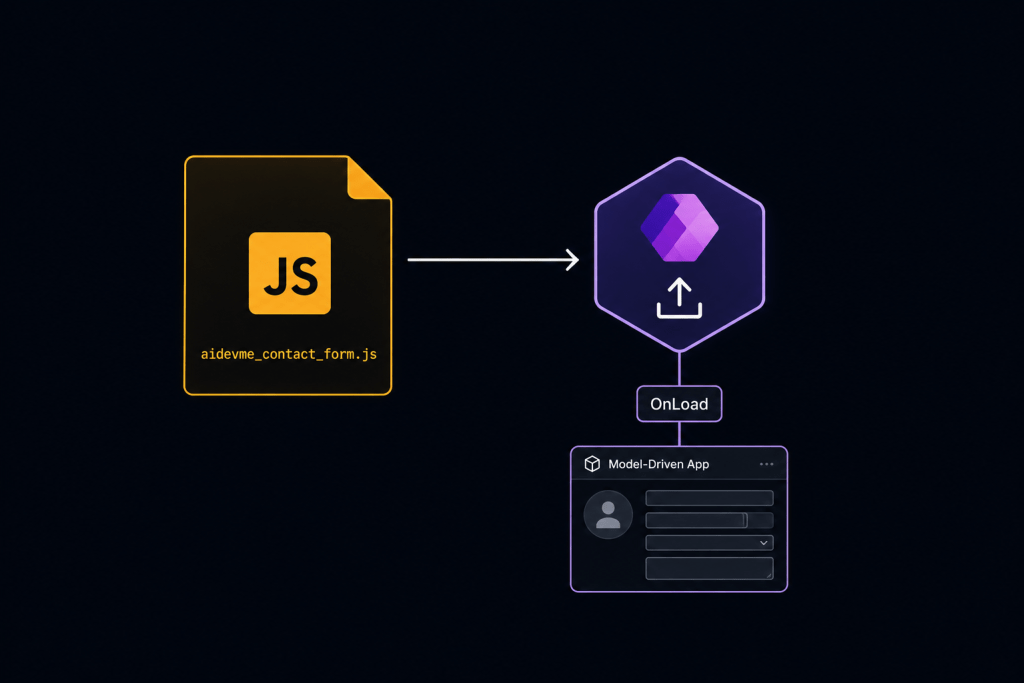
Approach 1: Plain JavaScript
Project Structure
/WebResources
  aidevme_contact_form.js
That’s it. One file, deployed as a JavaScript web resource.
The Code
// aidevme_contact_form.js
"use strict";

var aidevme = aidevme || {};
aidevme.Contact = aidevme.Contact || {};

/**
 * Called on form load.
 * @param {Xrm.Events.EventContext} executionContext
 */
aidevme.Contact.onLoad = function (executionContext) {
  var formContext = executionContext.getFormContext();

  formContext.getAttribute("firstname").addOnChange(
    aidevme.Contact.onNameChange.bind(null, executionContext)
  );
  formContext.getAttribute("lastname").addOnChange(
    aidevme.Contact.onNameChange.bind(null, executionContext)
  );
};

/**
 * Called when firstname or lastname changes.
 * @param {Xrm.Events.EventContext} executionContext
 */
aidevme.Contact.onNameChange = function (executionContext) {
  var formContext = executionContext.getFormContext();
  var firstName = formContext.getAttribute("firstname").getValue() || "";
  var lastName = formContext.getAttribute("lastname").getValue() || "";

  if (!firstName && !lastName) {
    formContext.ui.setFormNotification(
      "First name and last name cannot both be empty.",
      "ERROR",
      "name_validation"
    );
    return;
  }

  formContext.ui.clearFormNotification("name_validation");

  var greeting = "Hello, " + firstName + " " + lastName + "!";
  formContext.ui.setFormNotification(greeting, "INFO", "greeting");

  // Fetch related account
  var accountRef = formContext.getAttribute("parentcustomerid")
    ? formContext.getAttribute("parentcustomerid").getValue()
    : null;

  if (accountRef && accountRef.length > 0) {
    Xrm.WebApi.retrieveRecord("account", accountRef[0].id, "?$select=name")
      .then(function (result) {
        formContext.ui.setFormNotification(
          greeting + " | Account: " + result.name,
          "INFO",
          "greeting"
        );
      })
      .catch(function (error) {
        console.error("Failed to retrieve account: ", error.message);
      });
  }
};Deploying Plain JavaScript
- Save the file as
aidevme_contact_form.js. - In your solution, add a new JavaScript Web Resource — recommended naming:
aidevme/js/contact_form.js(use the publisher prefix folder convention). - Upload the file content.
- In the Contact form editor, go to Events → Form Libraries and add the web resource.
- Wire
aidevme.Contact.onLoadto the OnLoad event. - Publish.
Pros of Plain JavaScript
- Zero build step. Edit, upload, done. Great for quick fixes and small solutions.
- No toolchain to maintain. No
node_modules, no config files, no CI/CD pipeline changes. - Debugging is straightforward. The file you deploy is the file the browser runs. Browser DevTools source maps are unnecessary.
- Low onboarding friction. Any developer who knows JavaScript can pick it up immediately.
Cons of Plain JavaScript
- No type safety. Typos in Xrm API calls (
getAttributevsgetAttriubte) fail silently at runtime. - No IntelliSense for Xrm. Without
@types/xrm, your IDE cannot tell you whatformContext.getAttribute()returns. - Global namespace pollution. The
var aidevme = aidevme || {}pattern works but is fragile at scale. - No module system. Sharing utility functions across web resources requires either copy-paste or additional web resource files that must load in the right order.
- Harder to refactor. Renaming a function means a global find-and-replace across all files.
- No dead code elimination. Every line you write ships to the browser, even if it’s never called.

Approach 2: TypeScript + Webpack
Project Structure
/contact-form-webpack
  src/
    index.ts
    services/
      accountService.ts
    utils/
      notifications.ts
  dist/
    aidevme_contact_form.js   ← this is your web resource
  package.json
  tsconfig.json
  webpack.config.js
1. Initialize the Project
mkdir contact-form-webpack && cd contact-form-webpack
npm init -y2. Install Dependencies
npm install --save-dev typescript ts-loader webpack webpack-cli @types/xrmtypescript— the TypeScript compilerts-loader— Webpack loader that compiles.tsfileswebpack+webpack-cli— the bundler@types/xrm— type definitions for the entire Xrm client API
3. Configure TypeScript
// tsconfig.json
{
  "compilerOptions": {
    "target": "ES6",
    "module": "ESNext",
    "moduleResolution": "bundler",
    "strict": true,
    "outDir": "./dist",
    "sourceMap": true,
    "lib": ["ES6", "DOM"],
    "types": ["xrm"]
  },
  "include": ["src/**/*"]
}Note on target: ES6: Model-Driven Apps run in modern Chromium-based browsers, so ES6 is safe. If you need to support older environments or Unified Interface quirks, drop to ES5.
4. Configure Webpack
// webpack.config.js
const path = require("path");

module.exports = {
  mode: "production",
  entry: "./src/index.ts",
  output: {
    filename: "aidevme_contact_form.js",
    path: path.resolve(__dirname, "dist"),
    library: {
      name: "aidevme",           // exposes window.aidevme
      type: "assign-properties", // merges into existing aidevme namespace
    },
  },
  resolve: {
    extensions: [".ts", ".js"],
  },
  module: {
    rules: [
      {
        test: /\.ts$/,
        use: "ts-loader",
        exclude: /node_modules/,
      },
    ],
  },
  optimization: {
    minimize: true,
  },
  devtool: "source-map", // produces aidevme_contact_form.js.map
};library.type: "assign-properties" is key here. It merges your exports into an existing window.aidevme object rather than overwriting it, which matters if you have multiple web resources under the same namespace.
5. Add npm Scripts
// package.json (scripts section)
"scripts": {
  "build": "webpack",
  "build:dev": "webpack --mode development",
  "watch": "webpack --watch"
}6. The TypeScript Code
// src/services/accountService.ts
export async function getAccountName(accountId: string): Promise<string | null> {
  try {
    const result = await Xrm.WebApi.retrieveRecord(
      "account",
      accountId,
      "?$select=name"
    );
    return result.name as string;
  } catch (error) {
    console.error("Failed to retrieve account:", error);
    return null;
  }
}// src/utils/notifications.ts
export function setInfo(
formContext: Xrm.FormContext,
message: string,
id: string
): void {
formContext.ui.setFormNotification(message, "INFO", id);
}
export function setError(
formContext: Xrm.FormContext,
message: string,
id: string
): void {
formContext.ui.setFormNotification(message, "ERROR", id);
}
export function clear(formContext: Xrm.FormContext, id: string): void {
formContext.ui.clearFormNotification(id);
}// src/index.ts
import { getAccountName } from "./services/accountService";
import { setInfo, setError, clear } from "./utils/notifications";
export async function onLoad(
executionContext: Xrm.Events.EventContext
): Promise<void> {
const formContext = executionContext.getFormContext();
formContext
.getAttribute("firstname")
.addOnChange(() => onNameChange(executionContext));
formContext
.getAttribute("lastname")
.addOnChange(() => onNameChange(executionContext));
}
export async function onNameChange(
executionContext: Xrm.Events.EventContext
): Promise<void> {
const formContext = executionContext.getFormContext();
const firstName = formContext.getAttribute("firstname").getValue() ?? "";
const lastName = formContext.getAttribute("lastname").getValue() ?? "";
if (!firstName && !lastName) {
setError(formContext, "First name and last name cannot both be empty.", "name_validation");
return;
}
clear(formContext, "name_validation");
let greeting = `Hello, ${firstName} ${lastName}!`;
setInfo(formContext, greeting, "greeting");
const accountAttr = formContext.getAttribute("parentcustomerid");
const accountRef = accountAttr?.getValue() as Xrm.LookupValue[] | null;
if (accountRef?.length) {
const accountName = await getAccountName(accountRef[0].id);
if (accountName) {
setInfo(formContext, `${greeting} | Account: ${accountName}`, "greeting");
}
}
}7. Build and Deploy
A typical build for a project of this size completes in under 100ms. The output dist/aidevme_contact_form.js is identical in structure to the Webpack output and deployed the same way.
Pros of TypeScript + Webpack
- Full type safety with
@types/xrm— the compiler catchesgetAttributetypos, wrong parameter types, and missing null checks. - Module system — split your logic into services, utilities, and handlers; Webpack bundles them into one deployable file.
- IntelliSense everywhere — VS Code knows the full shape of
Xrm.FormContext,Xrm.WebApi,Xrm.LookupValue, etc. - Rich plugin ecosystem — Webpack’s loader/plugin model supports CSS-in-JS, image assets, environment variables, and more if your web resource ever needs them.
- Mature ecosystem — extensive documentation, Stack Overflow coverage, and enterprise adoption.
- Source maps — debug the original TypeScript in browser DevTools even in production.
Cons of TypeScript + Webpack
- Slow cold builds. For large projects,
webpack --mode productioncan take 10–30+ seconds. Incremental--watchbuilds are faster but not instant. - Complex configuration.
webpack.config.jscan grow large and intimidating. The learning curve is real. - Heavy
node_modules. A typical Webpack + TypeScript setup pulls in 200–400 MB of dependencies. - Overkill for small scripts. A 50-line form handler doesn’t need a bundler.

Approach 3: TypeScript + esbuild
esbuild takes a different philosophy: extreme speed above all else. Crucially, it’s written in Go, and it shows.
Project Structure
/contact-form-esbuild
  src/
    index.ts
    services/
      accountService.ts
    utils/
      notifications.ts
  dist/
    aidevme_contact_form.js
  package.json
  tsconfig.json
  build.js        ← esbuild build script
The src/ TypeScript files are identical to the Webpack example above — we only change the build toolchain.
1. Install Dependencies
npm init -y
npm install --save-dev typescript esbuild @types/xrmThat’s it. No loaders, no plugins for the basic case.
2. tsconfig.json
Same as the Webpack example. esbuild respects tsconfig.json for path aliases and module resolution but does its own transpilation (it does not use the TypeScript compiler for type checking — more on this below).
3. The esbuild Build Script
// build.js
import esbuild from "esbuild";

const isWatch = process.argv.includes("--watch");

const buildOptions = {
  entryPoints: ["src/index.ts"],
  bundle: true,
  minify: true,
  sourcemap: true,
  outfile: "dist/aidevme_contact_form.js",
  globalName: "aidevme",   // exposes window.aidevme
  platform: "browser",
  target: ["es6"],
  logLevel: "info",
};

if (isWatch) {
  const ctx = await esbuild.context(buildOptions);
  await ctx.watch();
  console.log("Watching for changes...");
} else {
  await esbuild.build(buildOptions);
}globalName: "aidevme" is esbuild’s equivalent of Webpack’s library.name. It assigns the module’s exports to window.aidevme.
4. Add npm Scripts
// package.json (scripts section)
"scripts": {
  "build": "node build.js",
  "watch": "node build.js --watch",
  "typecheck": "tsc --noEmit"
}Note the separate typecheck script. Because esbuild strips types without checking them, you run tsc --noEmit explicitly when you want type validation — typically in your CI pipeline.
5. Build and Deploy
npm run buildA typical build for a project of this size completes in under 100ms. The output dist/aidevme_contact_form.js is identical in structure to the Webpack output and deployed the same way.
Pros of TypeScript + esbuild
- Blazing fast builds. Sub-second builds, even for moderately large projects.
--watchmode is nearly instant. - Minimal configuration. The build script above is the entirety of your config.
- Same type safety as Webpack (via
@types/xrmand your IDE) — you still get full IntelliSense. - Smaller
node_modules— fewer dependencies than a full Webpack setup. - Great for CI/CD pipelines — fast builds mean faster release cycles when combined with Power Platform CLI and GitHub Actions.
Cons of TypeScript + esbuild
- No type checking during build. esbuild transpiles TypeScript by stripping types; it does not run the TypeScript compiler. You must run
tsc --noEmitseparately to catch type errors. - Smaller plugin ecosystem than Webpack. Edge cases (custom loaders, legacy polyfills, advanced code splitting) may require workarounds.
globalNamemerging caveat. Unlike Webpack’sassign-properties, esbuild’sglobalNameassigns the entire export object towindow.aidevme, potentially overwriting existing properties if multiple bundles use the same global name. Use a more specific name likewindow.aidevme.Contactand adjust your form event registrations accordingly.- Less battle-tested for complex enterprise setups than Webpack, though rapidly maturing.

Multi-Developer Projects: Forms, Ribbons, and Shared Libraries
When a team works on a single solution, the single-bundle approach breaks down quickly. Two developers editing the same index.ts creates merge conflicts on business logic that has nothing to do with each other. As a result, the answer is to align your bundle boundaries with your deployment targets — and in Model-Driven Apps there are two distinct targets: form event handlers and ribbon/command bar actions. They have different lifecycles, different Xrm API surfaces, and should be separate web resources anyway.
The Target Bundle Architecture
dist/
  aidevme_shared.js            → window.aidevme.Shared  (loaded first, everywhere)
  aidevme_contact_form.js      → window.aidevme.Contact
  aidevme_account_form.js      → window.aidevme.Account
  aidevme_opportunity_form.js  → window.aidevme.Opportunity
  aidevme_contact_ribbon.js    → window.aidevme.ContactRibbon
  aidevme_account_ribbon.js    → window.aidevme.AccountRibbon
Each developer owns one or two entry points. The only file that requires coordination is @aidevme/shared — and even that has a clear ownership model once the team agrees on the API surface.
Why forms and ribbons need separate bundles:
Form event handlers receive an Xrm.Events.EventContext and interact with formContext — attributes, controls, notifications, tabs. Ribbon actions, by contrast, receive a PrimaryControl which is either a FormContext or a GridControl depending on where the command is registered. Moreover, they often share WebApi service logic and validation utilities, but the entry point signatures and context types are different enough to justify separation. Mixing them in one bundle also means a ribbon deployment forces a reload of form logic and vice versa — not a problem at runtime, but noisy in your solution diff history.
Recommended Structure: npm Workspaces
The cleanest approach for a multi-developer team is an npm workspace monorepo. In this pattern, shared code lives in a proper internal package. Feature packages import it normally. Consequently, the bundler resolves it at build time — no runtime load-order risk, full TypeScript IntelliSense across the entire repo.
/aidevme-webresources
  package.json                    ← workspace root
  tsconfig.base.json              ← shared TS config
  packages/
    shared/
      src/
        index.ts
        webApiService.ts
        notificationHelper.ts
        validationUtils.ts
      package.json
      tsconfig.json
    contact-form/
      src/
        index.ts
      package.json
      tsconfig.json
      build.js
    account-form/
      src/
        index.ts
      package.json
      tsconfig.json
      build.js
    contact-ribbon/
      src/
        index.ts
      package.json
      tsconfig.json
      build.js
    account-ribbon/
      src/
        index.ts
      package.json
      tsconfig.json
      build.js
1. Workspace Root
// package.json (root)
{
  "name": "aidevme-webresources",
  "private": true,
  "workspaces": ["packages/*"],
  "scripts": {
    "build": "npm run build --workspaces --if-present",
    "typecheck": "npm run typecheck --workspaces --if-present",
    "watch": "npm run watch --workspaces --if-present"
  },
  "devDependencies": {
    "typescript": "^5.4.0",
    "esbuild": "^0.21.0",
    "@types/xrm": "^9.0.0"
  }
}Running npm run build from the root builds every package in dependency order. Individual developers run npm run build -w packages/contact-form to rebuild only their package.
2. Shared Base TypeScript Config
// tsconfig.base.json (root)
{
  "compilerOptions": {
    "target": "ES6",
    "module": "ESNext",
    "moduleResolution": "bundler",
    "strict": true,
    "sourceMap": true,
    "lib": ["ES6", "DOM"],
    "types": ["xrm"]
  }
}Each package extends this:
// packages/contact-form/tsconfig.json
{
  "extends": "../../tsconfig.base.json",
  "compilerOptions": {
    "outDir": "./dist"
  },
  "include": ["src/**/*"]
}3. The Shared Package
<em>// packages/shared/package.json</em>
{
  "name": "@aidevme/shared",
  "version": "1.0.0",
  "private": true,
  "main": "./src/index.ts",
  "types": "./src/index.ts",
  "scripts": {
    "typecheck": "tsc --noEmit"
  }
}Note "main": "./src/index.ts" — because esbuild resolves the workspace symlink at build time, it reads the TypeScript source directly. No pre-compilation step needed for the shared package.
// packages/shared/src/webApiService.ts
export async function retrieveRecord(
  entityName: string,
  id: string,
  options?: string
): Promise<Record<string, unknown>> {
  return Xrm.WebApi.retrieveRecord(entityName, id, options);
}

export async function retrieveMultipleRecords(
  entityName: string,
  options?: string
): Promise<Xrm.RetrieveMultipleResult> {
  return Xrm.WebApi.retrieveMultipleRecords(entityName, options);
}// packages/shared/src/notificationHelper.ts
export function setInfo(
formContext: Xrm.FormContext,
message: string,
id: string
): void {
formContext.ui.setFormNotification(message, "INFO", id);
}
export function setError(
formContext: Xrm.FormContext,
message: string,
id: string
): void {
formContext.ui.setFormNotification(message, "ERROR", id);
}
export function clear(formContext: Xrm.FormContext, id: string): void {
formContext.ui.clearFormNotification(id);
}// packages/shared/src/validationUtils.ts
export function isNullOrEmpty(value: string | null | undefined): boolean {
return !value || value.trim().length === 0;
}
export function getLookupId(
formContext: Xrm.FormContext,
attributeName: string
): string | null {
const attr = formContext.getAttribute<Xrm.Attributes.LookupAttribute>(attributeName);
const value = attr?.getValue();
return value?.length ? value[0].id : null;
}// packages/shared/src/index.ts
export * from "./webApiService";
export * from "./notificationHelper";
export * from "./validationUtils";4. A Form Package
// packages/contact-form/package.json
{
  "name": "@aidevme/contact-form",
  "version": "1.0.0",
  "private": true,
  "scripts": {
    "build": "node build.js",
    "watch": "node build.js --watch",
    "typecheck": "tsc --noEmit"
  },
  "dependencies": {
    "@aidevme/shared": "*"
  }
}// packages/contact-form/src/index.ts
import { retrieveRecord } from "@aidevme/shared";
import { setInfo, setError, clear } from "@aidevme/shared";
import { isNullOrEmpty, getLookupId } from "@aidevme/shared";
export async function onLoad(
executionContext: Xrm.Events.EventContext
): Promise<void> {
const formContext = executionContext.getFormContext();
formContext.getAttribute("firstname").addOnChange(() => onNameChange(executionContext));
formContext.getAttribute("lastname").addOnChange(() => onNameChange(executionContext));
}
export async function onNameChange(
executionContext: Xrm.Events.EventContext
): Promise<void> {
const formContext = executionContext.getFormContext();
const firstName = formContext.getAttribute("firstname").getValue() ?? "";
const lastName = formContext.getAttribute("lastname").getValue() ?? "";
if (isNullOrEmpty(firstName) && isNullOrEmpty(lastName)) {
setError(formContext, "First name and last name cannot both be empty.", "name_validation");
return;
}
clear(formContext, "name_validation");
let greeting = `Hello, ${firstName} ${lastName}!`;
setInfo(formContext, greeting, "greeting");
const accountId = getLookupId(formContext, "parentcustomerid");
if (accountId) {
const account = await retrieveRecord("account", accountId, "?$select=name");
if (account.name) {
setInfo(formContext, `${greeting} | Account: ${account.name}`, "greeting");
}
}
}// packages/contact-form/build.js
import esbuild from "esbuild";
const isWatch = process.argv.includes("--watch");
const buildOptions = {
entryPoints: ["src/index.ts"],
bundle: true,
minify: true,
sourcemap: true,
outfile: "dist/aidevme_contact_form.js",
globalName: "aidevme.Contact",
platform: "browser",
target: ["es6"],
logLevel: "info",
};
if (isWatch) {
const ctx = await esbuild.context(buildOptions);
await ctx.watch();
} else {
await esbuild.build(buildOptions);
}5. A Ribbon Package
Ribbon command handlers are wired up in the Command Bar (classic) or Command Designer (modern). The function signature differs from form events — no executionContext, instead you typically receive a primaryControl parameter configured in the command definition.
// packages/contact-ribbon/src/index.ts
import { retrieveRecord } from "@aidevme/shared";

/**
 * Enable rule: show the button only when the contact has a parent account.
 * Registered as an Enable Rule in the Command Designer.
 */
export function canSendWelcomeEmail(
  primaryControl: Xrm.FormContext
): boolean {
  const accountAttr = primaryControl.getAttribute("parentcustomerid");
  const accountRef = accountAttr?.getValue() as Xrm.LookupValue[] | null;
  return !!accountRef?.length;
}

/**
 * Action: called when the ribbon button is clicked.
 * Registered as the Command Action in the Command Designer.
 */
export async function sendWelcomeEmail(
  primaryControl: Xrm.FormContext
): Promise<void> {
  const contactId = primaryControl.data.entity.getId();
  const firstName = primaryControl.getAttribute("firstname").getValue() ?? "";

  const accountAttr = primaryControl.getAttribute("parentcustomerid");
  const accountRef = accountAttr?.getValue() as Xrm.LookupValue[] | null;

  if (!accountRef?.length) {
    Xrm.Navigation.openAlertDialog({ text: "No account associated with this contact." });
    return;
  }

  const account = await retrieveRecord("account", accountRef[0].id, "?$select=name,emailaddress1");

  // Trigger a custom action or flow via WebApi
  await Xrm.WebApi.online.execute({
    getMetadata: () => ({
      boundParameter: "entity",
      operationName: "aidevme_SendWelcomeEmail",
      operationType: 0,
      parameterTypes: {
        entity: { typeName: "mscrm.contact", structuralProperty: 5 },
      },
    }),
    entity: { contactid: contactId, "@odata.type": "Microsoft.Dynamics.CRM.contact" },
  });

  Xrm.Navigation.openAlertDialog({
    text: `Welcome email queued for ${firstName} at ${account.name}.`,
  });
}// packages/contact-ribbon/package.json
{
"name": "@aidevme/contact-ribbon",
"version": "1.0.0",
"private": true,
"scripts": {
"build": "node build.js",
"watch": "node build.js --watch",
"typecheck": "tsc --noEmit"
},
"dependencies": {
"@aidevme/shared": "*"
}
}// packages/contact-ribbon/build.js
import esbuild from "esbuild";
await esbuild.build({
entryPoints: ["src/index.ts"],
bundle: true,
minify: true,
sourcemap: true,
outfile: "dist/aidevme_contact_ribbon.js",
globalName: "aidevme.ContactRibbon",
platform: "browser",
target: ["es6"],
logLevel: "info",
});the Command Designer, register the function as:
- Action function name:
aidevme.ContactRibbon.sendWelcomeEmail - Enable rule function name:
aidevme.ContactRibbon.canSendWelcomeEmail
6. Git Ownership and Merge Strategy
With this structure, merge conflicts are nearly eliminated for day-to-day feature work:
packages/shared/         → owned by tech lead / reviewed by all
packages/contact-form/   → owned by developer A
packages/account-form/   → owned by developer B
packages/contact-ribbon/ → owned by developer A
packages/account-ribbon/ → owned by developer B
Changes to @aidevme/shared should go through a pull request review — it’s a public API that all feature packages depend on. A TypeScript breaking change in shared will cause compile errors in every dependent package, which npm run typecheck at the root catches before anything reaches the deployment pipeline.
7. Shared Library Approach Decision Guide
| Team size | Recommendation |
| Solo / 2 devs | Skip workspaces. Shared utilities in a src/shared/ folder within a single package, one entry point per form/ribbon. |
| 3–8 devs | npm workspaces as shown above. One package per form/ribbon area, @aidevme/shared internal package. |
| Large team / multiple solutions | Workspace + externals: deploy aidevme_shared.js as its own web resource, mark it external in all feature bundles. Add as a Form Library dependency in the form editor. Eliminates code duplication across deployed bundles at the cost of load-order management. |
| Plain JavaScript | TypeScript + Webpack | TypeScript + esbuild | |
| Build step required | No | Yes | Yes |
| Type safety | None | Full | Full (IDE) / partial (build) |
| Xrm IntelliSense | No | Yes | Yes |
| Build speed | N/A | Slow (10–30s) | Fast (<1s) |
| Configuration complexity | None | High | Low |
| Module system | No | Yes | Yes |
| Source maps | N/A | Yes | Yes |
| Dead code elimination | No | Yes | Yes |
| node_modules footprint | None | ~300–400 MB | ~50–100 MB |
| CI/CD friendliness | Good | Good | Excellent |
| Best for | Quick scripts, solo devs | Large teams, complex projects | Modern teams wanting speed + DX |

When to Choose What
Stick with plain JavaScript if:
- You’re writing a quick customization that won’t grow beyond a single file.
- The project is a one-off with no long-term maintenance expectation.
- The deployment environment restricts Node.js tooling.
- You’re working alone and speed-to-deploy is the top priority.
Choose TypeScript + Webpack if:
- You’re building a large, multi-file web resource library shared across many forms.
- Your team already uses Webpack elsewhere and wants consistency.
- You need advanced bundling features: dynamic imports, CSS modules, or environment-specific builds.
- Long-term maintainability and refactoring safety are critical.
Choose TypeScript + esbuild if:
- You want TypeScript’s developer experience without Webpack’s configuration overhead.
- Fast CI/CD pipelines matter — esbuild pairs naturally with Power Platform CLI in GitHub Actions.
- You’re starting a new project and want a clean, modern setup.
- You’re already familiar with TypeScript from Power Apps Code Apps or PCF development (the toolchain feels similar).
Deployment Scenarios
Building and bundling your TypeScript is only half the story. Getting the resulting .js files into Dataverse reliably — across dev, test, and production environments — is where teams often improvise. This section covers every realistic deployment scenario from a solo developer clicking through the maker portal to a fully automated multi-stage Azure DevOps pipeline.

Scenario 1: Manual Upload via the Maker Portal
The simplest option and the right choice for one-off fixes or when you’re first testing a new web resource.
Steps:
- Build your bundle locally:
npm run build # produces dist/aidevme_contact_form.js - Open make.powerapps.com and navigate to your solution.
- Go to Web resources → select the existing web resource → Edit.
- Click Choose file and upload
dist/aidevme_contact_form.js. - Click Save then Publish.
- Hard-refresh the browser running your Model-Driven App (
Ctrl+Shift+R) to clear the cached version.
For a new web resource:
- In your solution, click New → More → Web resource.
- Set the Name following your publisher prefix convention:
aidevme_/js/contact_form(the maker portal prepends the publisher prefix automatically). - Set Type to JavaScript (JS).
- Upload the file, save, and publish.
Limitations: Manual upload does not scale. It has no audit trail, no rollback, and is error-prone when multiple files need updating. Use it during initial development only.

Scenario 2: Power Platform CLI — Local Developer Workflow
pac (Power Platform CLI) is the right tool for day-to-day developer iteration. It lets you push individual files or entire solutions directly from your terminal without touching the maker portal.
Installation
# Via .NET tool (recommended — cross-platform)
dotnet tool install --global Microsoft.PowerApps.CLI.Tool

# Verify
pac helpAuthentication Profiles
pac supports multiple named authentication profiles, which is essential when you work across several environments (dev, test, UAT).
# Interactive login (browser pop-up, good for personal dev environment)
pac auth create \
  --name "aidevme-dev" \
  --url https://aidevme-dev.crm4.dynamics.com

# Service principal login (good for shared or CI environments)
pac auth create \
  --name "aidevme-dev-sp" \
  --url https://aidevme-dev.crm4.dynamics.com \
  --applicationId <CLIENT_ID> \
  --clientSecret <CLIENT_SECRET> \
  --tenant <TENANT_ID>

# List all profiles
pac auth list

# Switch active profile
pac auth select --index 1Tip: Store service principal credentials in environment variables or a secrets manager — never hardcode them in scripts committed to source control.
Pushing a Single Web Resource
The fastest inner-loop workflow: build, push, publish in one shot.
<em># Build the bundle</em>
npm run build -w packages/contact-form

<em># Push the updated web resource file directly (no solution zip involved)</em>
pac webresource upload \
  --environment https://aidevme-dev.crm4.dynamics.com \
  --path dist/aidevme_contact_form.js \
  --name "aidevme_/js/contact_form"

<em># Publish to make changes visible</em>
pac solution publish \
--environment https://aidevme-dev.crm4.dynamics.compac webresource upload matches the file to an existing web resource by its name in Dataverse. The name must already exist in the solution — use the maker portal to create it the first time, then pac for all subsequent updates.
Linking Your Local Folder to a Solution (pac solution init)
For a more structured approach, initialise a local solution folder that mirrors the Dataverse solution structure:
# Pull the solution from Dataverse into a local folder
pac solution clone \
  --name aidevmeSolution \
  --outputDirectory solution \
  --processCanvasApps false

# Your web resources land here:
# solution/WebResources/aidevme_/js/contact_form.jsAfter cloning, copy your build output into the solution folder and push the whole solution back:
# Copy bundles into the solution web resource folder
cp packages/contact-form/dist/aidevme_contact_form.js \
   solution/WebResources/aidevme_/js/contact_form.js

# Push all changed files back to Dataverse
pac solution push \
  --environment https://aidevme-dev.crm4.dynamics.com

# Publish
pac solution publish \
--environment https://aidevme-dev.crm4.dynamics.compac solution push is incremental — it only uploads files that have changed since the last sync. This makes it fast even for solutions with many web resources.
Full pac Workflow in One Script
Add this to your root package.json for a one-command deploy to dev:
"scripts": {
  "deploy:dev": "npm run build && node scripts/deploy.js"
}// scripts/deploy.js
import { execSync } from "child_process";
const env = "https://aidevme-dev.crm4.dynamics.com";
const bundles = [
{ src: "packages/shared/dist/aidevme_shared.js", name: "aidevme_/js/shared" },
{ src: "packages/contact-form/dist/aidevme_contact_form.js", name: "aidevme_/js/contact_form" },
{ src: "packages/contact-ribbon/dist/aidevme_contact_ribbon.js", name: "aidevme_/js/contact_ribbon" },
];
for (const bundle of bundles) {
console.log(`Uploading ${bundle.name}...`);
execSync(
`pac webresource upload --environment ${env} --path ${bundle.src} --name "${bundle.name}"`,
{ stdio: "inherit" }
);
}
execSync(`pac solution publish --environment ${env}`, { stdio: "inherit" });
console.log("Done. All web resources published.");
Scenario 3: GitHub Actions — Automated CI/CD
Automating deployment through GitHub Actions means every push to main (or a release branch) triggers a build, type check, and deployment without any manual steps. This is the right setup for teams of two or more.
Prerequisites
Create these secrets in your GitHub repository under Settings → Secrets and variables → Actions:
| Secret | Value |
DATAVERSE_URL | https://aidevme-dev.crm4.dynamics.com |
CLIENT_ID | Service principal application ID |
CLIENT_SECRET | Service principal client secret |
TENANT_ID | Azure AD tenant ID |
The service principal needs the System Administrator or System Customizer role in the target environment, and Dynamics CRM API permissions in Azure AD.
Single-Package Workflow
# .github/workflows/deploy-webresource.yml
name: Build and Deploy Web Resource

on:
  push:
    branches: [main]
    paths: ['src/**']
  workflow_dispatch:           # allow manual trigger from GitHub UI

jobs:
  build-and-deploy:
    runs-on: ubuntu-latest
    steps:
      - uses: actions/checkout@v6

      - uses: actions/setup-node@v6
        with:
          node-version: 24.x
          cache: npm

      - name: Install dependencies
        run: npm ci

      - name: Type check
        run: npm run typecheck

      - name: Build
        run: npm run build

      - name: Install Power Platform CLI
        run: dotnet tool install --global Microsoft.PowerApps.CLI.Tool

      - name: Authenticate
        run: |
          pac auth create \
            --url ${{ secrets.DATAVERSE_URL }} \
            --applicationId ${{ secrets.CLIENT_ID }} \
            --clientSecret ${{ secrets.CLIENT_SECRET }} \
            --tenant ${{ secrets.TENANT_ID }}

      - name: Upload web resource
        run: |
          pac webresource upload \
            --environment ${{ secrets.DATAVERSE_URL }} \
            --path dist/aidevme_contact_form.js \
            --name "aidevme_/js/contact_form"

      - name: Publish
run: pac solution publish --environment ${{ secrets.DATAVERSE_URL }}Workspace (Monorepo) Workflow with Per-Package Path Filtering
In a workspace repo, you want each package to deploy independently — a change to contact-form should not trigger a rebuild of account-ribbon. Achieve this with separate workflows per package, each filtered to its own path:
# .github/workflows/deploy-contact-form.yml
name: Deploy Contact Form

on:
  push:
    branches: [main]
    paths:
      - 'packages/contact-form/**'
      - 'packages/shared/**'   # rebuild contact-form if shared changes too
  workflow_dispatch:

jobs:
  deploy:
    runs-on: ubuntu-latest
    steps:
      - uses: actions/checkout@v6

      - uses: actions/setup-node@v6
        with:
          node-version: '24'
          cache: 'npm'

      - name: Install dependencies
        run: npm ci

      - name: Type check
        run: npm run typecheck --workspaces --if-present

      - name: Build contact-form
        run: npm run build -w packages/contact-form

      - name: Install Power Platform CLI
        run: dotnet tool install --global Microsoft.PowerApps.CLI.Tool

      - name: Authenticate
        run: |
          pac auth create \
            --url ${{ secrets.DATAVERSE_URL }} \
            --applicationId ${{ secrets.CLIENT_ID }} \
            --clientSecret ${{ secrets.CLIENT_SECRET }} \
            --tenant ${{ secrets.TENANT_ID }}

      - name: Upload
        run: |
          pac webresource upload \
            --environment ${{ secrets.DATAVERSE_URL }} \
            --path packages/contact-form/dist/aidevme_contact_form.js \
            --name "aidevme_/js/contact_form"

      - name: Publish
run: pac solution publish --environment ${{ secrets.DATAVERSE_URL }}Duplicate this workflow for each package, adjusting the paths, the build command, and the upload target. The shared package triggers rebuilds in all dependent packages via the packages/shared/** path filter.
Multi-Environment Promotion Workflow
For mature projects with dev → test → production promotion, use GitHub Environments with protection rules (required reviewers, deployment gates):
# .github/workflows/promote.yml
name: Promote to Production

on:
  workflow_dispatch:
    inputs:
      target_env:
        description: 'Target environment'
        required: true
        type: choice
        options: [test, production]

jobs:
  build:
    runs-on: ubuntu-latest
    steps:
      - uses: actions/checkout@v6
      - uses: actions/setup-node@v6
        with:
          node-version: '24'
          cache: 'npm'
      - run: npm ci
      - run: npm run typecheck --workspaces --if-present
      - run: npm run build --workspaces --if-present

      - name: Upload build artifacts
        uses: actions/upload-artifact@v4
        with:
          name: bundles
          path: packages/*/dist/*.js

  deploy-test:
    needs: build
    if: inputs.target_env == 'test'
    runs-on: ubuntu-latest
    environment: test                  # requires reviewer approval if configured
    steps:
      - name: Download artifacts
        uses: actions/download-artifact@v4
        with:
          name: bundles

      - name: Install Power Platform CLI
        run: dotnet tool install --global Microsoft.PowerApps.CLI.Tool

      - name: Authenticate and deploy
        run: |
          pac auth create \
            --url ${{ secrets.TEST_DATAVERSE_URL }} \
            --applicationId ${{ secrets.CLIENT_ID }} \
            --clientSecret ${{ secrets.CLIENT_SECRET }} \
            --tenant ${{ secrets.TENANT_ID }}
          pac webresource upload --environment ${{ secrets.TEST_DATAVERSE_URL }} \
            --path contact-form/dist/aidevme_contact_form.js \
            --name "aidevme_/js/contact_form"
          pac solution publish --environment ${{ secrets.TEST_DATAVERSE_URL }}

  deploy-production:
    needs: build
    if: inputs.target_env == 'production'
    runs-on: ubuntu-latest
    environment: production            # enforces required reviewers gate
    steps:
      - name: Download artifacts
        uses: actions/download-artifact@v4
        with:
          name: bundles

      - name: Install Power Platform CLI
        run: dotnet tool install --global Microsoft.PowerApps.CLI.Tool

      - name: Authenticate and deploy
        run: |
          pac auth create \
            --url ${{ secrets.PROD_DATAVERSE_URL }} \
            --applicationId ${{ secrets.CLIENT_ID }} \
            --clientSecret ${{ secrets.CLIENT_SECRET }} \
            --tenant ${{ secrets.TENANT_ID }}
          pac webresource upload --environment ${{ secrets.PROD_DATAVERSE_URL }} \
            --path contact-form/dist/aidevme_contact_form.js \
            --name "aidevme_/js/contact_form"
pac solution publish --environment ${{ secrets.PROD_DATAVERSE_URL }}GitHub Environments tip: Configure required reviewers on the production environment in Settings → Environments. This gives you a one-click approval gate before any code reaches production — no Azure DevOps required for teams already on GitHub.

Scenario 4: Azure DevOps Pipelines
For organisations running Azure DevOps, the Power Platform Build Tools extension provides first-class tasks for solution export, import, and publishing. Install it from the Azure DevOps Marketplace before using the tasks below.
Service Connection Setup
In Azure DevOps, create a Power Platform service connection:
- Go to Project Settings → Service connections → New service connection.
- Choose Power Platform.
- Enter the environment URL, tenant ID, application ID, and client secret.
- Name it
aidevme-dev-sc(you’ll reference this name in pipeline YAML).
CI Pipeline — Build and Upload
# azure-pipelines-ci.yml
trigger:
  branches:
    include: [main]
  paths:
    include: ['packages/*']

pool:
  vmImage: ubuntu-latest

variables:
  NODE_VERSION: '20'

steps:
  - task: NodeTool@0
    inputs:
      versionSpec: $(NODE_VERSION)
    displayName: 'Use Node.js $(NODE_VERSION)'

  - script: npm ci
    displayName: 'Install dependencies'

  - script: npm run typecheck --workspaces --if-present
    displayName: 'Type check'

  - script: npm run build --workspaces --if-present
    displayName: 'Build all packages'

  - task: PowerPlatformToolInstaller@2
    displayName: 'Install Power Platform Build Tools'
    inputs:
      DefaultVersion: true

  - task: PowerPlatformPublishCustomizations@2
    displayName: 'Upload and publish web resources'
    inputs:
      authenticationType: PowerPlatformSPN
      PowerPlatformSPN: 'aidevme-dev-sc'
      Environment: 'https://aidevme-dev.crm4.dynamics.com'

  - task: PublishBuildArtifacts@1
    displayName: 'Publish bundle artifacts'
    inputs:
      PathtoPublish: 'packages'
      ArtifactName: 'bundles'
publishLocation: 'Container'Note: PowerPlatformPublishCustomizations publishes all pending changes in the environment. For more granular control — uploading individual web resource files — use PowerPlatformImportSolution with a packed solution zip (see below), or call pac webresource upload via a script task alongside the Build Tools tasks.
CD Pipeline — Multi-Stage with Approvals
# azure-pipelines-cd.yml
trigger: none

resources:
  pipelines:
    - pipeline: ci
      source: aidevme-ci
      trigger:
        branches: [main]

stages:
  - stage: DeployTest
    displayName: 'Deploy to Test'
    jobs:
      - deployment: DeployWebResources
        displayName: 'Deploy to Test environment'
        environment: 'aidevme-test'        # configure approvals in Azure DevOps Environments
        pool:
          vmImage: ubuntu-latest
        strategy:
          runOnce:
            deploy:
              steps:
                - download: ci
                  artifact: bundles

                - task: PowerPlatformToolInstaller@2
                  inputs:
                    DefaultVersion: true

                - script: |
                    dotnet tool install --global Microsoft.PowerApps.CLI.Tool
                    pac auth create \
                      --url $(TEST_DATAVERSE_URL) \
                      --applicationId $(CLIENT_ID) \
                      --clientSecret $(CLIENT_SECRET) \
                      --tenant $(TENANT_ID)
                    pac webresource upload \
                      --environment $(TEST_DATAVERSE_URL) \
                      --path $(Pipeline.Workspace)/ci/bundles/contact-form/dist/aidevme_contact_form.js \
                      --name "aidevme_/js/contact_form"
                    pac solution publish --environment $(TEST_DATAVERSE_URL)
                  displayName: 'Upload and publish to Test'

  - stage: DeployProduction
    displayName: 'Deploy to Production'
    dependsOn: DeployTest
    jobs:
      - deployment: DeployWebResources
        displayName: 'Deploy to Production environment'
        environment: 'aidevme-production'  # requires manual approval gate
        pool:
          vmImage: ubuntu-latest
        strategy:
          runOnce:
            deploy:
              steps:
                - download: ci
                  artifact: bundles

                - task: PowerPlatformToolInstaller@2
                  inputs:
                    DefaultVersion: true

                - script: |
                    dotnet tool install --global Microsoft.PowerApps.CLI.Tool
                    pac auth create \
                      --url $(PROD_DATAVERSE_URL) \
                      --applicationId $(CLIENT_ID) \
                      --clientSecret $(CLIENT_SECRET) \
                      --tenant $(TENANT_ID)
                    pac webresource upload \
                      --environment $(PROD_DATAVERSE_URL) \
                      --path $(Pipeline.Workspace)/ci/bundles/contact-form/dist/aidevme_contact_form.js \
                      --name "aidevme_/js/contact_form"
                    pac solution publish --environment $(PROD_DATAVERSE_URL)
displayName: 'Upload and publish to Production'Configure manual approval on aidevme-production under Pipelines → Environments → aidevme-production → Approvals and checks.

Scenario 5: Solution Export/Import — Managed vs Unmanaged
For enterprise ALM, web resources travel inside Power Platform solutions. Understanding the managed/unmanaged distinction is critical — deploying the wrong type to the wrong environment is one of the most common causes of customisation conflicts.
Unmanaged Solutions
Use unmanaged solutions in development environments only. They are editable, deletable, and merge freely with other customisations.
# Export the unmanaged solution from dev
pac solution export \
  --name aidevmeSolution \
  --path ./solution-exports/aidevmeSolution_unmanaged.zip \
  --managed false \
  --environment https://aidevme-dev.crm4.dynamics.com

# Unpack into source control (human-readable XML + JS files)
pac solution unpack \
  --zipFile ./solution-exports/aidevmeSolution_unmanaged.zip \
  --folder ./solution \
--packageType UnmanagedAfter unpacking, your web resource files sit alongside the rest of the solution components in ./solution/WebResources/. Commit the unpacked folder to source control — this is your source of truth, not the zip.
Managed Solutions
Use managed solutions in test and production environments. They are immutable, version-controlled, and can be cleanly uninstalled.
# Pack the unpacked solution folder into a managed zip
pac solution pack \
  --zipFile ./solution-exports/aidevmeSolution_managed.zip \
  --folder ./solution \
  --packageType Managed

# Import the managed solution into test
pac solution import \
  --path ./solution-exports/aidevmeSolution_managed.zip \
  --environment https://aidevme-test.crm4.dynamics.com \
  --activate-plugins true

# Publish after import
pac solution publish \
--environment https://aidevme-test.crm4.dynamics.comFull Export → Pack → Import ALM Flow
The complete ALM loop for a release looks like this:
Dev environment (unmanaged)
  │
  ├─ pac solution export --managed false
  ├─ pac solution unpack → ./solution/
  ├─ git commit + PR review
  │
  └─ CI pipeline triggers on merge to main:
       ├─ npm run build  (TypeScript → JS bundles)
       ├─ copy dist/*.js → solution/WebResources/
       ├─ pac solution pack --packageType Managed
       ├─ pac solution import → Test environment
       ├─ pac solution publish
       │
       └─ CD pipeline (manual approval gate):
            ├─ pac solution import → Production environment
            └─ pac solution publish
Managed vs Unmanaged: Decision Rules
| Unmanaged | Managed | |
| Dev environment | ✅ Always | ❌ Never |
| Test environment | ❌ Avoid | ✅ Always |
| Production environment | ❌ Never | ✅ Always |
| Can edit customisations directly | Yes | No |
| Can uninstall cleanly | Partial | Yes |
| Tracks solution version | No | Yes |
| Recommended for CI/CD output | No | Yes |
Critical rule: Never import an unmanaged solution into production. It bypasses version tracking, makes rollback nearly impossible, and is the root cause of most “who changed this and when?” incidents in enterprise Dynamics projects.
Versioning Your Solution
Increment the solution version on every release. Combined with managed solutions this gives you a complete deployment audit trail visible in the Solutions list in the maker portal.
<em># Bump version before packing</em>
pac solution version \
  --strategy patch \
  --patchVersion 5

<em># Then pack and import as normal</em>
pac solution pack \
  --zipFile ./solution-exports/aidevmeSolution_1.0.5_managed.zip \
  --folder ./solution \
  --packageType Managed
Deployment Scenario Decision Guide
No single deployment method is right for every project. The right choice depends on team size, the maturity of the solution, and how much control you need over environment promotion. The table below maps common scenarios to the method that fits best — but treat it as a starting point, not a rulebook.
| Scenario | Best fit |
| First-time setup, testing a new web resource | Manual upload via maker portal |
| Solo developer, active iteration on a single form | pac webresource upload + pac solution publish in a local script |
| Small team (2–4 devs), feature branches | GitHub Actions per-package workflow, deploy to dev on PR merge |
| Mid-size team, multiple environments | GitHub Actions + GitHub Environments with approval gates |
| Enterprise, Azure DevOps shop | Azure DevOps multi-stage pipeline + Power Platform Build Tools |
| Regulated environment, full ALM audit trail | Managed solution export/import via CI/CD with version bumping |
Start Simple, Automate Incrementally
One of the most common mistakes is skipping straight to a full CI/CD pipeline before the codebase is stable. A solo developer building their first TypeScript web resource should start with pac webresource upload — it is fast, requires no YAML authoring, and keeps the feedback loop tight. Add a GitHub Actions workflow once you have a second developer, not before.
The reverse mistake is equally costly: staying on manual portal uploads once a team grows past one. Without automation, “deploy to UAT” becomes a manual checklist, version drift between environments is inevitable, and rollbacks are painful.
Environment Promotion Is the Key Constraint
The main reason to adopt managed solutions and a pipeline is environment promotion safety. Unmanaged components in a test environment can be modified by anyone with Maker-level access. Managed components cannot — which means the only way to change what’s in test or production is through a deliberate, versioned deployment. This is the property that regulated industries, financial services, and government projects require.
If your project does not have a test and production environment today, it will. Build the habit of managed exports early, even if you are currently deploying by hand, so that switching to pipeline-driven promotion is a configuration change rather than a rearchitecting exercise.
Mixing Methods Within a Repo
It is perfectly valid to mix methods across the lifecycle of a single repo:
- Develop locally with
pac webresource upload— fast inner loop, no pipeline needed. - Merge to
mainand let GitHub Actions push the built web resource to the shared development environment automatically. - Promote to UAT via a GitHub Environment with a manual approval gate — the same pipeline job, gated by a reviewer.
- Promote to Production as a managed solution import, also gated, with the solution version bumped by the pipeline.
Each stage uses the same pac commands under the hood; what changes is who triggers them and what approval controls are in place.
Signs You Have Outgrown Your Current Method
| Symptom | What to do |
| “Which version is in UAT right now?” is an open question | Add managed solution versioning and a deployment log |
| Two developers broke each other’s changes in the shared dev environment | Switch to per-developer environments or feature-branch builds |
| Hotfix deployments take more than 30 minutes | Automate the upload-publish-export chain into a single pipeline trigger |
| Auditors asked for a change history of form scripts | Enforce managed solution imports with version bumping on every release |
| Build times are slowing down as more packages are added | Move to per-package CI with path filters to build only what changed |

Conclusion
Plain JavaScript web resources are not going away, and they don’t need to. For small, focused customizations they remain the fastest path to a working solution. But as soon as your web resource logic grows — multiple handlers, shared utilities, async WebApi calls, a team of more than one — the lack of types and modules becomes a real maintenance burden.
Between the two bundled approaches, esbuild is the better default for new projects. The build speed, minimal configuration, and toolchain familiarity (especially if you’re already writing Code Apps or PCF controls in TypeScript) make it the pragmatic choice. Webpack remains the right call when you need its richer plugin ecosystem or have an existing monorepo that already depends on it.
For multi-developer projects, the npm workspace pattern with one package per form area and one per ribbon area eliminates the single-bundle bottleneck entirely. Shared utilities live in @aidevme/shared, consumed as a proper typed internal package, bundled into each output at build time. The result is a repo where each developer owns a clear slice of the codebase, merge conflicts are rare, and the CI pipeline builds and deploys only what changed.
On deployment: start with pac webresource upload for local iteration, graduate to per-package GitHub Actions or Azure DevOps pipelines as the team grows, and always use managed solutions in test and production. The combination of versioned managed solutions and a CI/CD pipeline gives you the audit trail and rollback safety that enterprise Dynamics projects demand.
The good news throughout: once you’ve written your TypeScript source, switching bundlers is swapping one config file. Moving from a single package to a workspace is reorganizing folders. Adding a deployment pipeline is layering automation on top of pac commands you’re already running locally. Each step is incremental — you don’t have to do it all at once.
Resources
Microsoft Docs
- Web resources in model-driven apps — Overview of web resource types, capabilities, and URL conventions in Dataverse.
- JavaScript web resources — How JavaScript web resources work, their capabilities, and limitations.
- Apply business logic using client scripting in model-driven apps — Official guide for attaching JavaScript to form events and the client API object model.
- Client API reference for model-driven apps — Full reference for the
Xrmobject model includingXrm.WebApi,formContext, and all event objects. - Best practices for client-side scripting — Microsoft’s official guidance on avoiding common scripting pitfalls in model-driven apps.
- pac solution CLI reference — All
pac solutioncommands includingexport,import,pack,publish, andversion. - pac webresource CLI reference —
pac webresource uploadand related commands for managing web resources from the command line. - GitHub Actions for Microsoft Power Platform — Official docs for automating Power Platform solution deployments via GitHub Actions.
- Microsoft Power Platform Build Tools for Azure DevOps — Azure DevOps extension for multi-stage Power Platform CI/CD pipelines.
TypeScript & Bundlers
- TSConfig reference — All TypeScript compiler options including
target,lib,strict,module, andisolatedModules. - esbuild documentation — Build API, bundling options, and performance benchmarks for esbuild.
- Webpack concepts — Entry points, loaders, plugins, and output configuration for Webpack.
- @types/xrm on npm — Community-maintained TypeScript type definitions for the Xrm client API.
npm
- npm workspaces — Official reference for configuring and running commands across a multi-package npm workspace.
Have thoughts on this comparison or a different bundling setup you prefer? Share it in the comments or reach out on LinkedIn.
If you found this useful, consider subscribing to the AIDevMe newsletter for more Power Platform architecture deep dives.